How Roofing Contractors Capture Hard-To-Get Measurements

Sometimes collecting measurements on a rooftop can be difficult, even dangerous. In this article, I want to show a few ways roofing contractors capture hard-to-get measurements efficiently and stay safe in the process.
In this article we’ll cover the following:
- How to create measurable documents when drawings are not available
- Measuring sloped surfaces and lengths for material takeoffs
- Drawing and image tools for documenting site conditions
First, let’s do material quantity takeoffs on a commercial project. This example project is an older building with no available construction drawings. The roof is flat, but we need to generate a drawing layout to include the surface area, any parapet heights where materials continue from the horizontal surface to vertical. We also might have to account for materials at expansion joints, curbs, or count the number of drain locations.
Create Measurable Documents
Measurements on Aerial Images
One way we can establish a drawing to measure quantities is by generating an image from popular internet applications. Whether you go to a popular mapping site or Google Earth, we simply type in the address of the proposed project in the search bar. Follow these quick steps.
- Zoom in as close as you can to the building aerial image.
- Before you create a screenshot, if possible include the bar scale indicating the image scale.
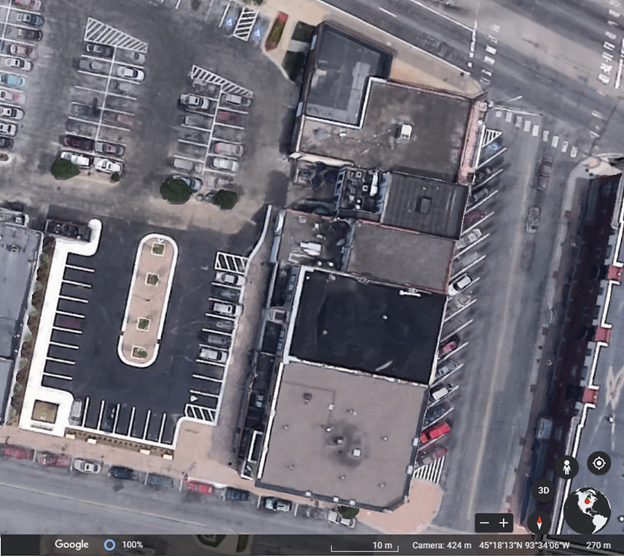
- Save the screenshot as an image or directly to PDF format.
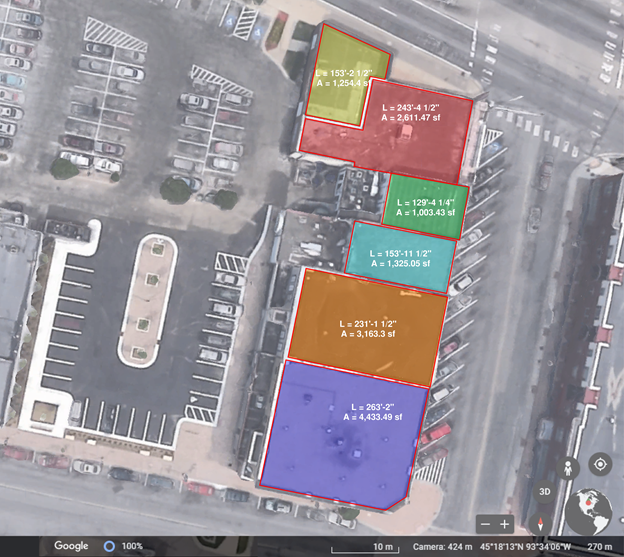
- In Bluebeam Revu, either open the image, or insert the image on to a PDF. I recommend you either flatten the image or go to the Properties Panel and lock the image. This way you won’t accidently move or stretch the image.
- Then go to the Measurement Panel and calibrate the image using the bar scale in the image. If a bar scale was not provided, you can use a known measurement like a sidewalk, parking space or wall if you know the dimension.
- With the calibration set, you can now use Area Measurement tools to highlight the extent of the roof. Using the Depth parameter, you can set the height of the parapet to capture the vertical portion of the roof membrane. This would be the Wall Height Measurement.
- With the same measurement, Revu provides the perimeter length around the entire area. This can account for flashing, facia, soffit or other edge finishing materials.
- You may also want to use the Area Cutout tools to eliminate roof hatches, openings, or large areas where different material are required.
- The Polylength tool can be used to measure any expansion joints, raised curbs or other linear footage materials.
- And finally using the Count tools you can location and quantify roof drains, or pipe flashing.
Measurements on New Document
In the event you cannot find a good quality aerial image, we might have to do a site visit, but we can still collect valuable information using Revu.
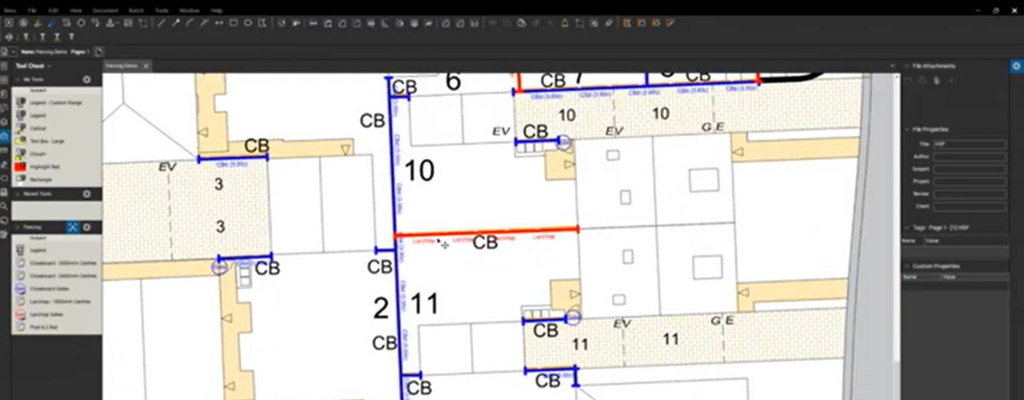
- Start a new blank document by going to File > New PDF and select the size document you want to work with.
- Before you click OK to close that window, check out the pull-down menu where you can turn on a 1/8” engineering grid. This will help you draw things proportionally and closer to scale.
- Once on site, you can use the Polylength tool to sketch the perimeter as you measure your way around the roof edge. This will again give you those measurements for flashing, vertical measurements, etc. You can fill in the area measurements and any cutouts, curbs, expansion joints, etc. on site or later depending on site conditions.
- You might also choose to use the Sketch-to-Scale tools to draw the roof layout by entering true measurements and angles.
Measuring Sloped Surfaces
What happens when the roof is sloped, how could Revu possibly do all the complicated math? While we used to have to build custom columns in the markups list and enter the formulas, Bluebeam of course automated it for us back in 2017 (Reason to upgrade).
- Measure the roof from an image, drawing or sketch just like we did with the flat roof, except this time go to the Measurement Panel and update the Slope parameter to 8/12 or whatever the roof slope is. The drawing will now show the roof pitch and the new area measurement with the math already done!
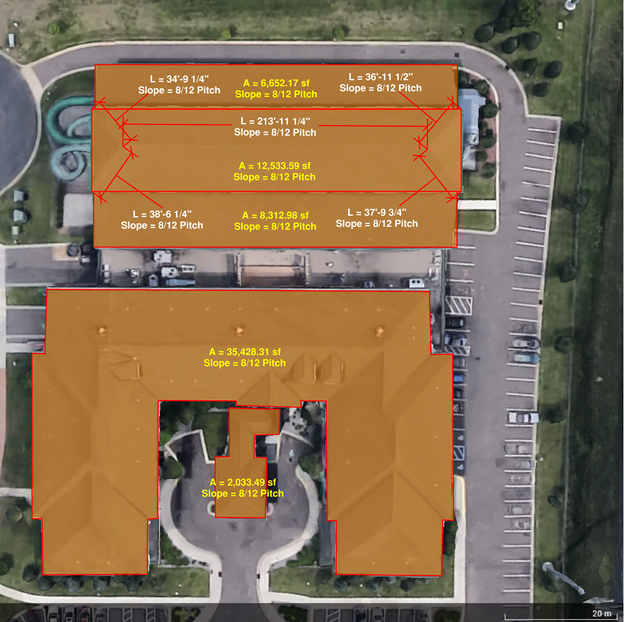
- Same as the flat roof, the perimeter length of the roof area is going to give you the facia and soffit linear footage.
- Use the count tools to note roof vents, pipe flashing or other penetrations.
- For the ridge and valley measurements, you’re going to use the standard length measurement, but again adding the roof slope to get the actual sloped dimension.
Documenting Site Conditions
When possible it’s always best practice to actually see the roof, assess any damage, and record information that may affect the scope and bid. With these other methods, roof access wasn’t available so maybe extra cost is added to cover surprises. Just like any contractor, Bluebeam has tools available for collecting field data.
- When you come across damaged areas or special conditions, simply make a note on the drawing with the markup tools. Once the markup is place, right-click on it and go to Capture > From Camera. You can now take a picture or video and it will attach itself to the markup. That image now lives in the PDF and everyone knows exactly where the image was taken.
Here’s one of my previous articles Top 5 Tips & Tricks for Collecting Field Data.
I hope this was helpful in pointing out the tools that are available in Revu to take advantage of as a Roofing Contractor. As always there are many others, I just wanted to get you thinking about the possibilities of estimating, collecting field notes and images.
I probably gave away too many secrete in this post, if you’re interested in seeing these steps in action, check out a video I created just for the roofing contractor.
If you’d like help creating custom tools for specific material takeoffs, site visits, or just want to learn more about what’s possible, please connect with me. I’d love to learn what workflows have led to your company’s success and see if we can improve on them in a custom digital workflow.
For more information on this topic, Click Here for a parallel article written for Bluebeam.
[…] to no access on-site. If this gets you thinking about possibilities, check out my article, “How Roofing Contractors Capture Hard-To-Get Measurements Using Bluebeam Revu,” where I go into greater technical […]
[…] to no access on-site. If this gets you thinking about possibilities, check out my article, “How Roofing Contractors Capture Hard-To-Get Measurements Using Bluebeam Revu,” where I go into greater technical […]
[…] no access on-site. If this gets you thinking about possibilities, take a look at my article, ‘How Roofing Contractors Capture Hard-To-Get Measurements Using Bluebeam Revu‘, where I go into greater technical […]
[…] Objekt haben. Ausführlichere technische Details zu diesem Thema können Sie meinem Artikel „How Roofing Contractors Capture Hard-To-Get Measurements Using Bluebeam Revu“ (nur auf Englisch verfügbar) […]