It All Started With An Email… A guest post by Doug McLean of Towne Millwork
Those of you who’ve been following UChapter2 since back in the Bluebeam And Burgers days, you already know our friend Doug McLean of Towne Millwork Ltd in Abbotsford, British Columbia, Canada. He shared some great tips a few years ago with his guest post “Creating a Detailed Scope List of Millwork Estimates Using Bluebeam Revu“.
Even if you’ve already read that one, go back for a refresher. He’s going to pile on some additional innovative wisdom in this next article. The fact this is Doug’s second article proves he is continually shaping the landscape of the Bluebeam community through evolving custom workflows, curiosity, and continuous learning.

Thank you Doug for the wisdom you’ve shared in these articles, the activity in forums, and your presence on LinkedIn and other channels. You’re a fixture in the Bluebeam community and we all appreciate everything you share.
I spent a lot of time in the woods shop in high school and actually still take advantage of every opportunity to design and build wood projects. In this article, Doug’s going to tell us how he’s building Interoperability by ripping and joining estimating tools in the Architectural Millwork industry.
My attempt at dropping a few “shop terms” into the introduction probably earned me the shop broom for a week. 🙂
Doug writes:
Interoperability… that’s the new buzzword. The ability to take data from one silo and share it easily with another silo. Custom Columns in Revu, along with some other tools for processing data, make interoperability an easy reality. A while back I was tasked with seeing if it was possible to take the data from Revu and make it easily importable into an Architectural Millwork estimating program called Takeoff. I not only found out that this was possible but relatively easy once the process is set up. Setting it up does take a while, but you only need to do that once. After that, a piece of cake. The following is how I went about all of this.
In an effort to become more LEAN at work, we’re trying to automate a few processes. We are doing our level best to remove duplicated processes, especially when it comes to moving data between two sources. One of my main pain points has always been moving the data from Revu to Takeoff, our Millwork estimating software. I didn’t even really think it was possible given the age of our version of Takeoff, little did I know.
For those of you who don’t know of Takeoff, it’s a program built by and for Cabinetmakers and Architectural Millworkers. It’s for way more than just Casework as well. It was developed by People Logic Software, and I would encourage you to check it out on your own time.
I was contacted about this via email a few weeks back by the designer of Takeoff (Axel Wagner). The ability to take data generated in Bluebeam Revu and import it into Takeoff is functionality others want as well. Axel and the great people at People Logic are not Revu users. Axel and I are connected on LinkedIn, and he knew that I was pretty good with Revu, so he contacted me. So that’s how this whole thing started.
I told him that I was having similar thoughts recently, only mine had to do with using Revu’s markup tools to make it easier to manually enter the data into Takeoff. I honestly wasn’t aware that we could import data into it. After talking back and forth with Axel for a bit, I not only found out that it was possible but reasonably easy once you got the data into the correct form. He even sent me a document showing me what data Takeoff needed. It was for a slightly newer version than what we have, but I figured there was no harm in seeing…. Lo and behold, I could Import a CSV file into Takeoff.
I got to thinking about how I could get the data from Revu properly into Takeoff. I knew I could create the custom columns I needed, but I wasn’t too sure how to import the options that Takeoff can apply to each millwork item. Takeoff uses a delimited list and there isn’t really an easy way of doing that in Revu. Well, I figured, let’s give this a shot and we’ll work that out when we get there.
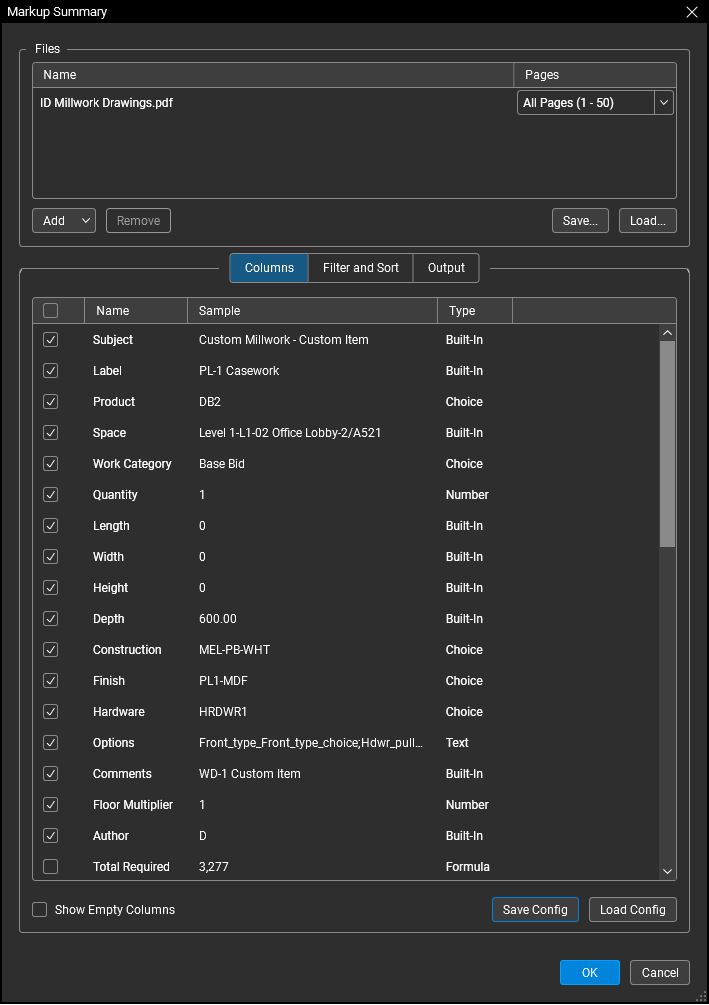
I set out by exporting a few things out of Takeoff, mainly the catalogue. I would also need a list of the Construction, Finish, and Hardware details. Those are the first four custom columns that would be required in Revu. Let me tell you that the product catalogue is quite large, having it broken down with Subjects, makes the choice list a little shorter that’s for sure. I also made the Custom Column for Options and left it as a Text column. I set out to build a few basic test tools, just to see what I was up against. Everything went about as I expected except for a few minor details.
First, you have to set your calibration correctly.
You NEED to either have it set to mm (if metric) or in” (you’ll see this below ft’ in”). This part is important. The tools in Revu don’t necessarily work in a way that is compatible with Takeoff. For example, if you use the Area tool in Revu, you get these measurements, Length, Height, Width, if you use the Perimeter or Polylength tool in Revu, you get a Length measurement. You can also get a Depth measurement with these tools, which is also needed. The issue then becomes that the Length from an Area markup is actually a perimeter measurement but, what Takeoff needs is Height, Width, and Depth.
I use the Area tool on things like casework, wall panels, and diewalls. I set the Depth as the depth of the cabinet. With the Perimeter and Polylength tools, which I use to mostly mark Fillers, Plant on Gables, and panel returns on Elevation drawings. However, Takeoff requires Height and Width.
Are you seeing the problem here? There was also this pesky problem with the Optional parts.
OK, problem one…
Making the measurements that Revu takes compatible with what Takeoff needs. It’s actually REALLY easy if you know Power Query in Excel.
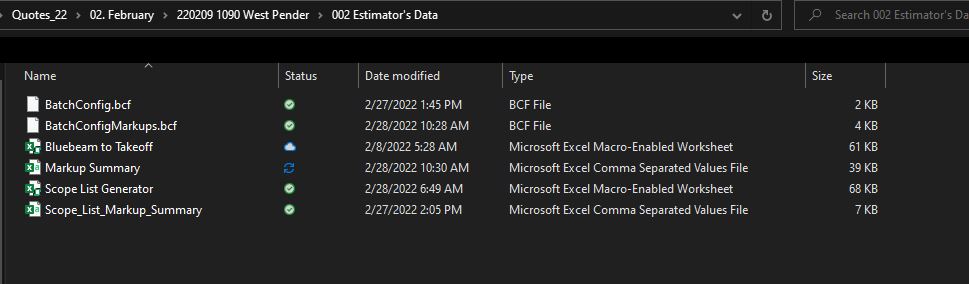
I simply set myself up an Export BatchConfig file to export the data in a consistent form. Then I can use Power Query to wash the CSV file and turn it into useable data.

When I say it’s easy in PQ, it is if you know how. All I really did was create two custom columns that said if x=0 then Y else X. So if Height = 0 then Length, else Height. If Width = 0 then Depth, else Width. These two column functions make it so that Takeoff has a consistent set of data to read. I then deleted the columns that I didn’t need, re-organized them to the way Takeoff would require them, and exported them back to an Excel Table. The REALLY amazing thing about Power Query is that once this Query is written, we can reuse it on all of our exports. No need to ever do it again. We’ve assigned it to a button with a macro and it executes.
I won’t go into all the details of PQ here, but I would encourage you to learn it. It will make your life with Revu (and Excel) that much easier. There are many tutorials online and on YouTube. Three I follow are Excelisfun, Excel Campus, and xelplus.com with Leila Gharani. Invest a few hours on weekends, you’ll become a Rockstar in no time. Mr. Excel is also great for those looking for VBA solutions.
My test run was only one room, a practical application would generate many rooms. Takeoff has a limitation that it can only import a Room at a time, which needed to be addressed. Two Excel macros saved the day. One to break the table into individual sheets based on a selected column, and one to save those sheets into CSV files so I can import those rooms into Takeoff. These macros are each on a button and execute in less than 1 minute each. Easy peasy.
Now to address problem 2.
Takeoff allows you the ability to apply options to specific items. Like say, add a lock, or an extra adjustable shelf, stud spacing on diewalls, or even special hardware. There are also some global parameters such as whether the casework on the project uses pilasters for the adjustable shelves or just holes. All these things had to somehow get into Revu. What I didn’t want to do was to have multiple custom columns showing all the options available as most of them don’t apply to all items.
Fortunately, the options available usually only apply to certain types of catalogue items. I didn’t need to worry too much about the global ones. Until Revu allows me to put two options into one custom choice column, the only thing I could think of doing was hardcoding the data and building a list for people to reference what those options were and how to change them. At some point, I’m hoping to be able to update all this so that these are variables. We also think that there’s a possibility of using some JavaScript, but we’ll figure that out later.
What we do is simply this.
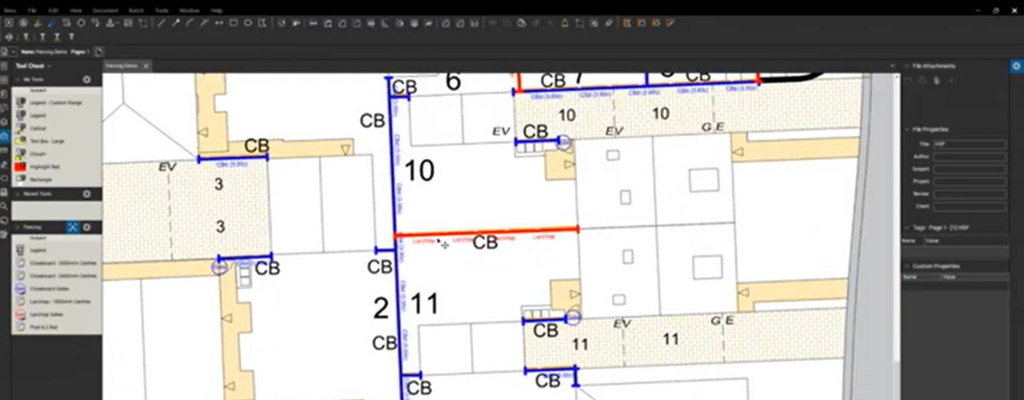
- Create a Space on the elevation or something to give us the Room name. Match this with the name you entered into Takeoff. This also gives us a very convenient way to sort any given page if there is more than one elevation on it.
- Pick a generic tool for what we want to Mark up, and highlight.
- Work through the custom columns to define what this is given its Subject.
- Product type
- Edit the Label if necessary
- Set the
- Construction Group
- Finish Group
- Hardware Group
- Note that all of these can be set up as default values as you see fit.
- Set its Depth if necessary
- We do have some tools set to a default depth.
- Adjust any options that there might be for that item
- Again, some tools are set up with appropriate default values.
- Save it to a custom Tool chest for reuse
We simply markup our drawings in the exact same way we would manually enter them into Takeoff. Want to show a field joint, an electrical cut-out, or a trash ring grommet, we have a tool. Just add it to the drawings. Once they do get imported, Takeoff will read the information and fill in the rest of the holes. One thing to keep note of, is that Takeoff will only include things that it has in its database. If it can’t read something, it will ignore it. This also makes it pretty clear what you’ve included in your bid.
I figure the best way to deal with anything different is to just make the first one and save it to a Toolchest for re-use. We also had one issue come up in Beta testing that I didn’t think of, but we quickly made it work. Will there be more, of course? We have a great team; we’ll deal on the fly. A new workflow is kinda fun actually. Keeps one on their toes.
Long story short. Five Custom Columns. 11 new Toolboxes. Almost 100 new Markup tools, with options, 8 new line styles. A full new Power Query, two Excel macros, and a major adjustment to our existing workflows. In all, it took me about a week. Other than one (so far) little programming error, it’s working exactly as it should. The time that it now takes us to get our data into Takeoff is going to drop exponentially based on the size of the project. What would have taken us hours now takes minutes, days now take less than an hour. As I said above, Takeoff has a limitation that it can only import a Room at a time. I’ve been told that Axel and his team are working on that problem. That would be amazing.
We also now have a full data set from all our Markups that our Project Management team can access easily. I think that was worth the week’s investment.
My advice? Find a way to make the data that comes out of Revu compatible with whatever software you’re using for your estimates. Get that interoperability working for you. Useful data is KEY and there is no substitution for it. Anything you can do to speed up the entry and accuracy of data between different software is going to improve efficiency and lessen mistakes. Showing yourself to secretly be a plus 1 doesn’t hurt either.
Full disclosure, I’m just beginning my journey into VBA. I downloaded the two that I talked about. Use the online resources at hand. That’s why they’re there. Thank you to those that wrote those two amazing functions.
Since writing this, I’ve discovered a few other things.
- One, Takeoff will only recognize a Product. It will not populate something if it’s in any way a component of said Product, we had to deal with that issue.
- Two, be diligent in setting up your tools. Really make sure that the first one is correct before you save it to a toolchest. The biggest curve we had in learning this workflow is right here. If you forget something here, the error compounds quickly as you work your way through the job.
- As I’m Canadian, we do most of our work in metric. With the update to Revu that allowed outputs in any unit of measure regardless of the set scale, we were able to make all of our tools to output metric measurements. Since we get about 50% of our drawings with Imperial measurements, this saves us the step of having to convert imperial measurements to metric for our machinery. This also saves us from making sure that we have Takeoff set to the correct unit of measure. We now just have it set to Metric and we never have to worry about it. Many times before we would have it set to Imperial, and we’d type in 24” only to have it default to 2440”, causing our whole calculation to be incorrect.
- Our Project Management department has started taking our raw data and importing it into Microvellum to do some initial material takeoffs, saving them time as well. (One test we did saved one of our Millwork techs 2 days on producing an initial material list).
I hope you enjoyed Doug McLean’s description of Towne Millwork Ltd. With Bluebeam Revu so versatile and customizable, you’re really only limited by your own creativity to develop powerful workflows. I echo his approach with every customer. Start with the end in mind and work backward, from Estimate software format to the custom toolsets. If Revu is changing the way you do business, I’d love to help tell your story here on UChapter2. Even the shortest stories can spark ideas. Email me your story at Troy.DeGroot@UChpater2.com
Responses