How To Use & Manage Layers in Bluebeam Revu – A Quick Rundown

Let’s wrap up this three-part blog series with “How To Use and Manage Layers In Bluebeam Revu”. If you missed my previous post titled “4 Ways To Create Layers in Bluebeam Revu”, jump back and read that one to learn different ways layers can be created.
So now we have layers in our PDF markups. You might be wondering:
“What opportunities do layers create?”
“I don’t know what I don’t know.”
“How do I use layers?”
“What does Managing layers in Bluebeam Revu even mean?”
Great questions. What good are layers if you don’t know how to use or manage them? I might miss something, but in this post I hope to cover everything we can do managing layers in Bluebeam Revu. Some might be more relatable than others depending on users’ workflows. I’d love to see your comments and questions over in the Brainery. If you’re not a member of the Brainery user groups & forums, what are you waiting for?
Here’s what we’re going to cover:
- Layer Visibility.
- Setting Current Layer.
- Merge Layers.
- Changing Layer Color.
- Layer Groups.
- Removing Layers.
- Flattening Layers.
- Zoom!
Hang in there to the end, you might really like the Zoom feature.
Layer Visibility.
Once your layers are assigned to specific markups, you’re able to quickly hide/unhide layers in Bluebeam.
- Go to the Layers Panel (Alt+Y)
- Click the small checkbox with the visibility eye inside.
*Notice as you click the eye, those layers in the document are turning on/off.
*If layers are greyed out in the layers panel, that means they exist in the document, but not on the current page. It could also me the layer exists in the document, but there are no markups assigned to it yet.

Setting Current Layer.
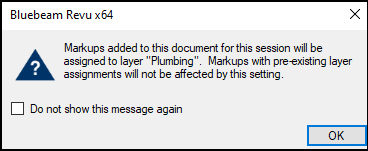
Did you know you can set a specific layer to be current? Just like in CAD software, you can set a layer to “current” and all the markups you place going forward will be on the specified layer.
- Go to the Layers Panel
- Right-click on the desired layer, or create a new one.
- Select Markup Layer.
Merging Layers.
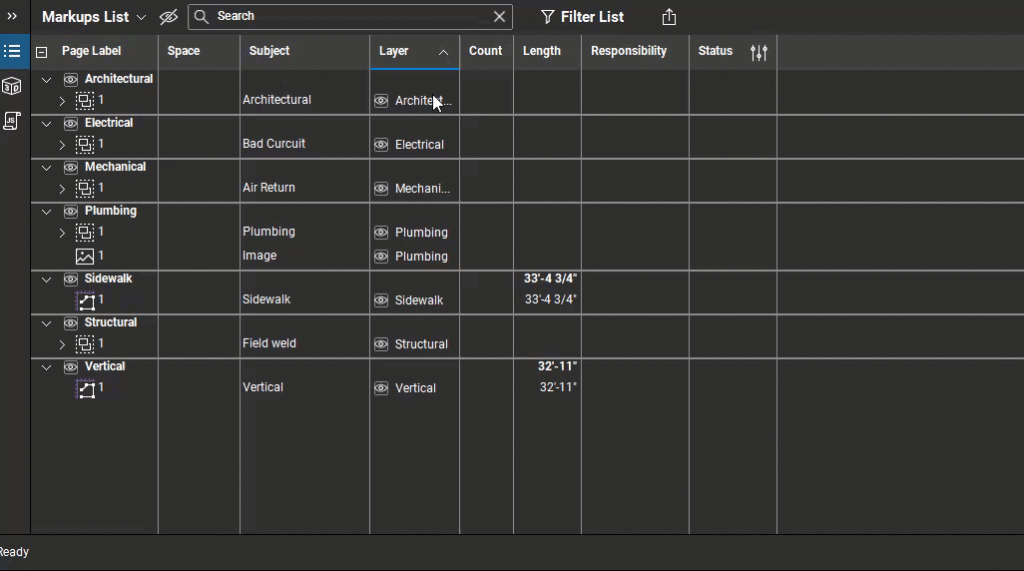
If you have markups on several layers and you want to merge them all to one layer, here’s the trick. In the .gif below, you’ll see me select several layers in the markups list.
- Open the Markups List (Alt+L)
- Clicking on the heading of the Layer column will sort them by layer making it easier to find markups.
- Select all the layers you want to merge together using the shift or ctrl keys.
- Right-click and select Layers > Create New Layer.
- Name the new layer. I named the layer MEP and you can see in the layers column, all the markups merge into the new layer.
If you have markups not on a layer or on an incorrect layer, you can move layers by selecting those markups in the markups list, right-click and select the layer you want them moved to.
Changing Layer Color.
For some users they associate layers with colors, so even though colors and layers are not related at all, we can use them together.
- In the markups list, select all the markups on a specific layer.
- Go to the Properties Panel (Alt+P) and change the color properties.
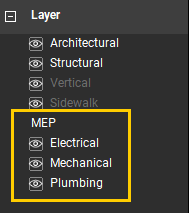
Layer Groups.
If you use several layers and want to add some organization to the layers panel, you can create layer groups (categories).
- Right-click in the layers panel and select New Layer Group.
- Revu will prompt you to name the group.
- Now simply click & drag layers and drop them under the group title. Use your Shift or Ctrl keys to select several layers at a time.
Removing Layers.
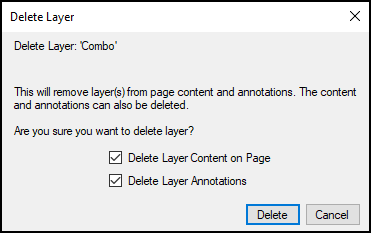
You can also easily remove layers from your pdf document.
- Go to the Layers Panel
- Right-click on the layer you no longer want.
- Select Delete. The resulting “Delete Layer” window will provide flexibility giving a couple options.
- With only “Delete Layer Content on Page” checked, the layer will be deleted, your markups will remain on the document, but no longer be assigned to a layer.
- With only “Delete Layer Annotations” checked, the markups and layers will be deleted.
- If you have both options checked, Revu will delete the markups and remove the layers.
- If you have both options unchecked, the layer will be deleted, your markups will remain on the document, but no longer be assigned to a layer.
As you can see the options are confusing and some of them even produce the same results. If you have different results with your testing. Please let us all know in the Brainery.
Flattening Layers.
When you flatten a document, everything gets pressed into the PDF, so they’re no longer editable. However, even though the markups are flattened, you can still adjust the visibility in the Layers Panel. You also don’t have to flatten all layers, you can select each or not.
- You can flatten a layer in Bluebeam by right-clicking on it in the Layers Panel and selecting Flatten Markups.
- Or under the menus Document > Flatten (Ctrl+Shift+M).
To learn more about the flattening options, take a look at my article on Bluebeam’s Built Blog.
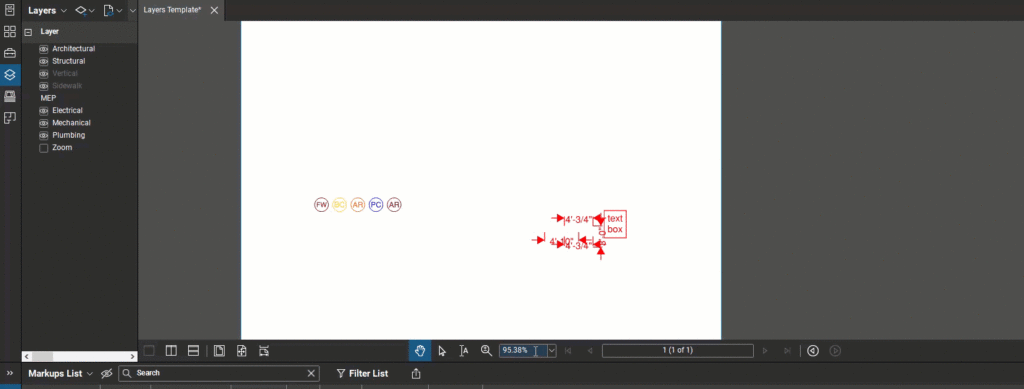
Zoom Layers.
Do you ever have several markups in a small area overlapping each other making them difficult to read? Did you know you can tell your markups to not show up until you zoom in close enough?
- In either the markups list or on the drawing itself, select all the congested markups and right-click to put them on a specific layer. I created a new one named “Zoom”
- Right-click on the layer in the Layers Panel and select Layer Properties.
- At the bottom select Zoom: On When In Range and select the zoom parameters. For the gif below I set the layer to hide when I zoom between 350% -1000%
I hope that helps you better understand all the ways we’re using and managing layers in Bluebeam Revu. With “Zoom” being what I would consider the mic drop of the article, I’ll have to end it here. However, writing this I thought of a new tip, check it out in the Tips & Tricks group in the Brainery. Might as well join while you’re there scrolling through the other tips.
If you need help incorporating Layers into your workflows, or have any customization services questions, don’t hesitate to reach out. Contact me.

Responses