Don Walke
Member
Forum Replies Created
-
 Points: 5,891Rank: UC2 Brainery Purple Belt
Well, just shut down for the second time and it’s fixed.
-
Points: 5,891Rank: UC2 Brainery Purple Belt
Where are custom column sets other than associated with a particular profile?
-
Points: 5,891Rank: UC2 Brainery Purple Belt
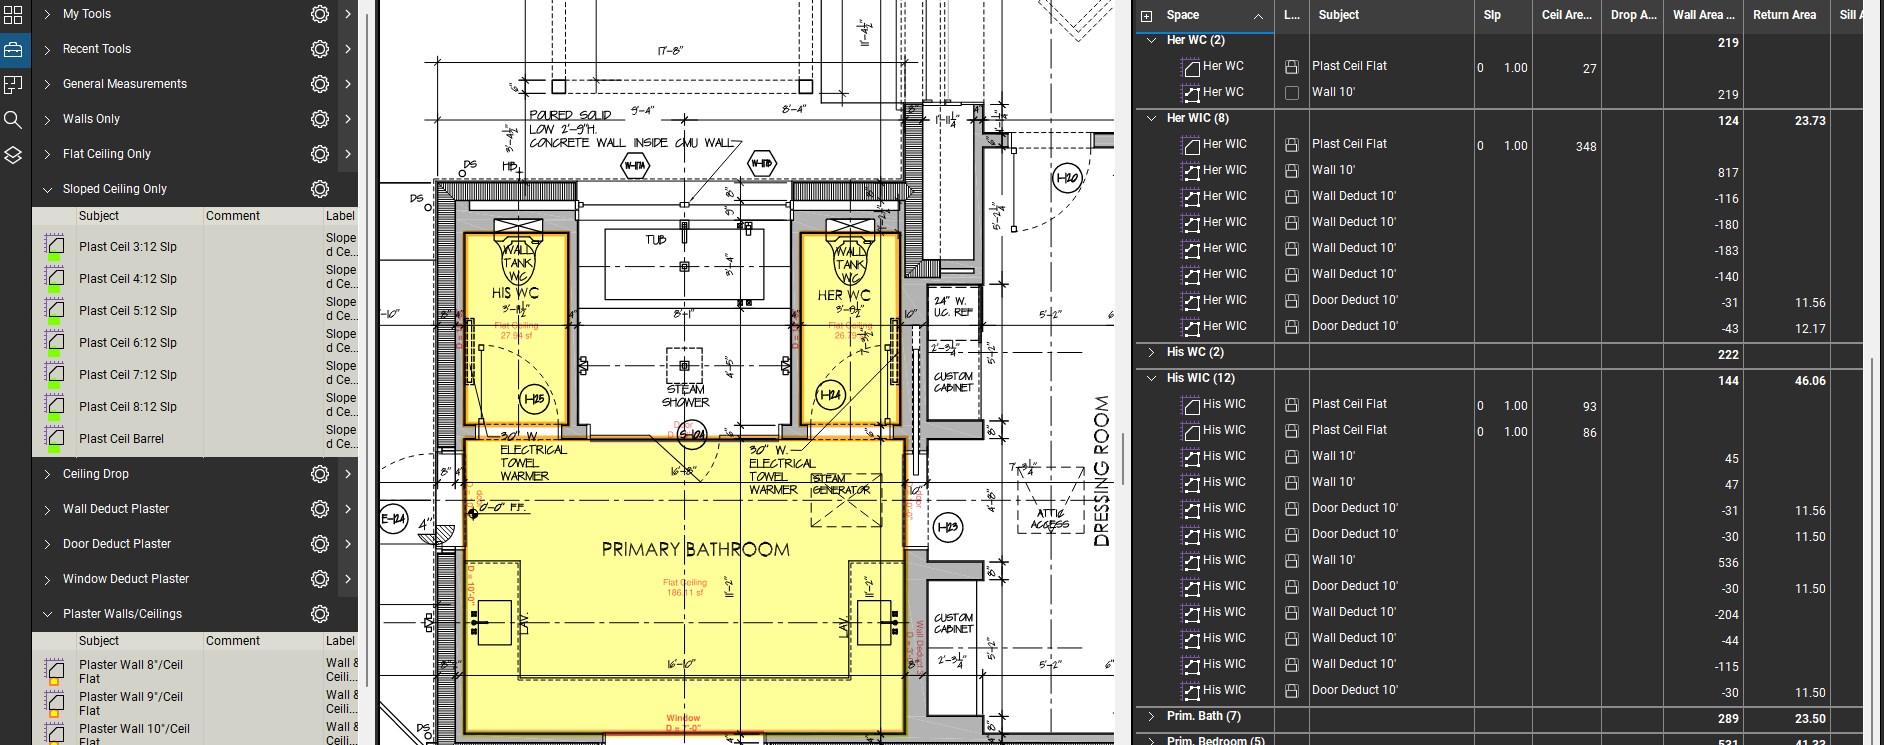
Thanks for all the input. Here is what I will finally settle on. Working with two monitors (P17 TP w/ extended 27″ screen) keep the markup panel on the TP and floor plan on 27″. Drop a numbered markup at each door location while having the properties panel pulled out from the right side on the 27″ screen leaving plenty of floor plan showing. The properties panel becomes my dynamic text box kinda-sorta.
By the way, is there a way to make a “choice” custom column, with a number associated with the various choices, produce a total? It seems that when you create a choice column, the “include in totals” option is not available.
-
Points: 5,891Rank: UC2 Brainery Purple Belt
Just thought of the answer. Hide the choice column and create a formula column that references the choice column.
-
-
Points: 5,891Rank: UC2 Brainery Purple Belt
Thanks for the input. I already have the custom columns built and data entered, it’s just that entering the data is a bit tedious as information is located on a door schedule. More info is available while looking at a finish schedule (casing type and finish on either side of the door, handing of the door, ect. More info located in a finish hardware schedule. Just looking for an easier way to gather the info in one place for each door on the floor plan even if it’s scaled very small and need to zoom to read. Well, as they say, if it was easy, anybody could do it. Thanks again.
-
Points: 5,891Rank: UC2 Brainery Purple Belt
I don’t know how accurate you need to be. Real life says that what you planned in the office won’t happen in the field. All the calculations will result in an answer of approximately 1 lf of saw cut per 1 sf of slab, given a 2′ x 2′ grid. The larger the slab the closer it will become as slab edges become less in proportion to slab area.
-
Points: 5,891Rank: UC2 Brainery Purple Belt
Another workflow process that I think helps is to lock your tools, then only unlock a line or group of lines on your markup list to make changes. I have corrupted many a tool in my toolbox by making a change to a markup while the tool was still open, thereby changing the tool.
-
Points: 5,891Rank: UC2 Brainery Purple Belt
I do wish that the formula functions included a simple “if” function. Because it doesn’t, I have been forced to use several “choice” custom columns with a yes or no choice and a 1 assigned to the yes and a 0 assigned to the no. I use this as a “switch” in a formula column to include the result or not.
-
Points: 5,891Rank: UC2 Brainery Purple Belt
Still miss using a planimeter (not really). It was my first year out of UF Building Construction in 1977, Highway contractors were the only ones hiring.
-
Points: 5,891Rank: UC2 Brainery Purple Belt
I’ve done this hundreds of times as an estimator for a heavy & highway contractor using pencils and a calculator. Choose a grid, say 10′ x 10′ and create a tool such as a text box that you could input the existing grade as a value in a custom column and also the proposed grade as a value in a custom column. This markup would be added at each intersection of the grid. Another custom column with a formula could subtract the existing grade from the proposed grade and multiply by 100sf then divide by 27 to get the bank measure of the cut or fill in cubic yards. I suppose you could also sort by the result and determine the total cut (negative numbers) and fill (positive numbers) to show how much dirt is to be moved on site and if there is excess or import required. Applying specific compaction and truck measure factors and there you have it.
-
Points: 5,891Rank: UC2 Brainery Purple Belt
Thanks, works like a charm. Another 20 second process in the work flow that will save many headaches later.