

Bluebeam for Telecom Contractors: Structured Cabling Takeoffs from Bid to Closeout

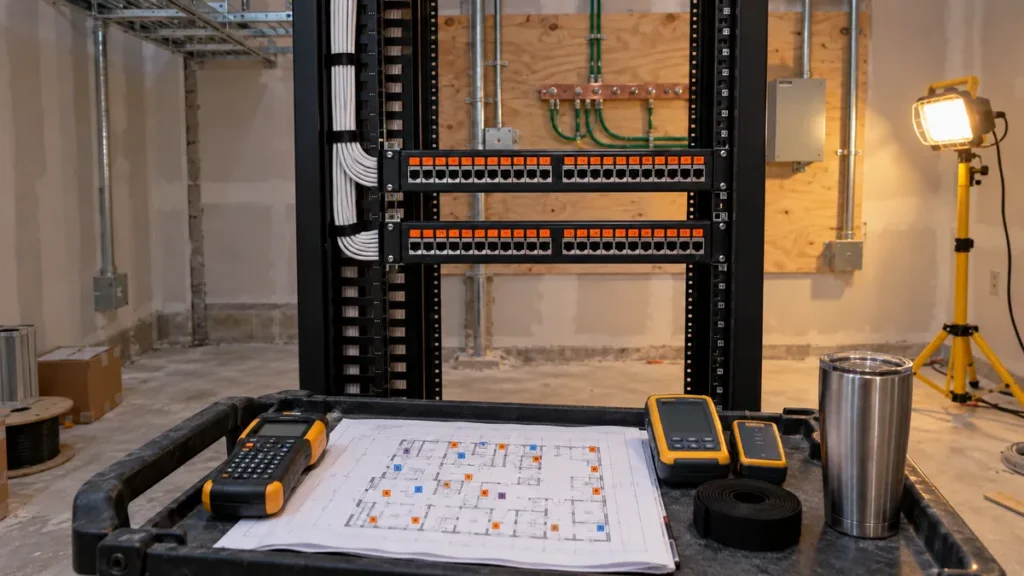
On most structured cabling bids, the drop count isn’t the hard part. The drawings show every outlet (in hospitals, schools, and larger commercial work, telecom often gets sheets of its own), the symbol legend tells you whether it’s a single, a double, or a quad, and anyone on your team can click through a floor plan and land on the same number. The part that wins or loses the job is the footage. Every one of those drops has to run home to a specific telecom room, and how far it travels depends entirely on which room that is.
That’s where a lot of Bluebeam takeoffs for this trade stop short. The count gets done carefully, and then the cable gets priced off one average length for the whole building, or a percentage somebody settled on years ago. On a one-closet tenant improvement, that’s close enough. On a three-story school with an MDF and four IDFs, it’s a guess with a lot of zeros behind it.
Every Drop Has a Home Closet
Before you can price cable, you need to know which closet serves which part of the building. The drawings usually answer that, on the floor plans or in a riser diagram that lays out each IDF’s serving area. The simplest way to carry that into the takeoff is one drop tool per closet, each in its own color with the closet in its subject. Every drop you place is tagged with its home closet the moment it lands, and the Markups List sorts the whole set by closet: 84 drops home to IDF-2A, 112 to IDF-2B. Same clicks you were already making. A much more useful answer.
That breakdown matters beyond footage, too. Patch panel ports, horizontal cable managers, and rack space all scale per closet, not per building. Sorting the Markups List by closet hands your estimator the closet-by-closet picture they’d otherwise rebuild by hand.
Measure the Run, Then Do the Math
The method most telecom estimators use for horizontal cable is average drop length: measure the path from the closet to the nearest outlet and to the farthest, then average the two. It’s quick, and it works right up until most of your drops sit on the far side of the building. That’s why experienced estimators break the floor into zones and average each one separately. Closet by closet, that’s exactly what this takeoff already does.
Bluebeam handles the measuring side of that better than most people realize. A PolyLength measurement traced along the actual pathway, out of the closet, down the corridor cable tray, and over to the room, gives you a real horizontal number instead of a straight line scaled across the plan. And the part most takeoffs fudge, the cable climbing out of the closet and dropping down the wall to the outlet, doesn’t have to be a guess. PolyLength’s Rise/Drop property adds that vertical distance into the measured total. Your service loops and slack still go on top, but now they’re an allowance you chose, not a fudge factor covering for a missing measurement.
The farthest run deserves a second look on its own. The structured cabling standard caps installed horizontal cable at 295 feet (90 meters), and on a long building with closets in the wrong spots, that farthest drop can get uncomfortably close. Catching it during the bid, with the measurement sitting right there on the drawing, is a much better conversation than catching it during installation.
From there, give each drop a footage value based on its closet’s measured average plus your slack allowances, and the Markups List totals cable by closet right alongside the count. The footage is built from your measurements and your assumptions, and anyone reviewing the bid can see exactly where every number came from. And if an IDF moves in a revision, you re-trace two runs, not two hundred.
Labels That Start in the Takeoff
Then there’s labeling. Every drop needs an identifier that ties the jack in the wall to a specific port on a specific patch panel in a specific closet, and on most jobs those IDs live in a cable schedule: a spreadsheet that the installers, the label printer, and the test results all have to agree with.
Bluebeam’s Sequences let the takeoff and that schedule start as the same thing. A sequence numbers each markup automatically as it’s placed, in whatever format you define, so the drop tool for IDF-2A can number its drops 2A-001, 2A-002, and on through the floor. Export the Markups List and the drop IDs, closets, and locations are already sitting in a spreadsheet, ready to become the cable schedule. The numbered drawing goes to the installers, the same IDs follow the cable through termination and testing, and the set you bid from becomes the as-built record at closeout instead of something reconstructed from test reports at the end of the job.
Try This: Build a Sequence Tool
If you take one thing from this post, make it this. A sequence tool is one of the most useful markups in Bluebeam, and it works the same whether you’re numbering telecom drops, fire alarm devices, punch items, or RFI clouds. Here’s how to build one in Revu 21.
- Create a Text Box markup and type placeholder text with as many characters as your longest number will need. If you’ll number past 100, use three characters.
- Right-click the Text Box, open Properties, and set the alignment to center so the numbers stay centered as they grow from one digit to three.
- If you want a border that stays the same size, draw a Rectangle or Ellipse around the Text Box, then set the Text Box’s own line width to zero so you’re left with just the text inside a separate shape. Style the shape in your closet’s color, then select both and Group them into a single markup.
- Right-click the grouped markup, choose Add to Tool Chest, and pick the Tool Set where you want it to live.
- Right-click the new tool in the Tool Set and choose Sequence > Define.
- In the Sequence dialog, choose a numbering Style (leading zeros work, so your drops can read 001 instead of 1), add a Prefix (2A- for drops home to IDF-2A, for example), and set Start to 1 and Increment to 1.
- Under Options, decide whether the sequence should reset per page or per document. If a closet’s drops cover more than one sheet, leave per-page reset off so the numbers keep counting across sheets. You can also turn on renumbering when markups are deleted, so if you delete 2A-004, every number after it shifts down to close the gap.
- Click OK and start placing. Every click drops the next number in the sequence, and the Markups List tracks every one.
Build one sequence tool per closet, each in its own color, and your takeoff starts doubling as the labeling plan.
Want every drop to carry its closet, floor, or patch panel? You can add a custom column to the Markups List and fill it in as you place each tag.
Built Around How Your Team Bids
Back in 2021, I built a Tool Set for a building automation controls contractor in New England, a different trade with the same shape of problem: devices on a drawing, cable running back to a panel, and a mountain of data that has to stay attached to every device from design through startup.
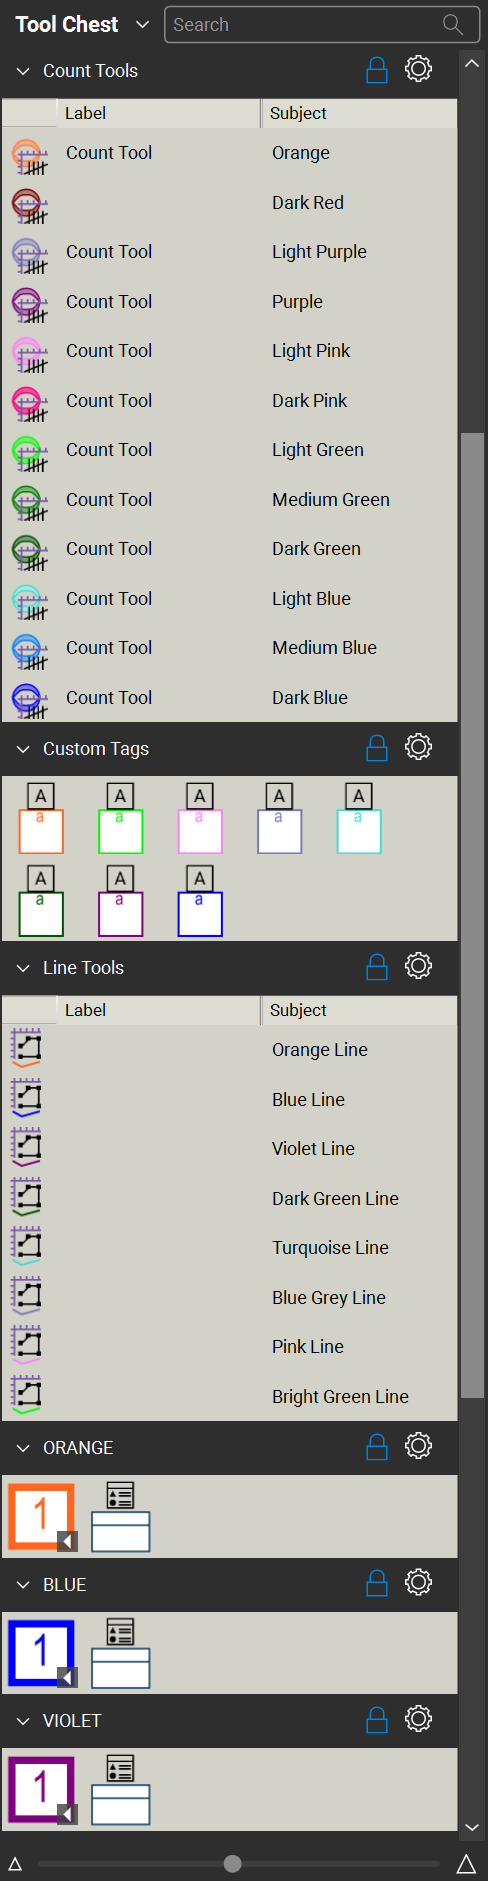
They already had something most firms don’t: a color standard that worked. Every control system on a project had its own color, and the whole team knew the code by heart. Their system was successful; it just needed to be brought into the digital age, so we brought that legacy system straight into Bluebeam. They counted twelve device types and ran up to eight systems on their largest projects, so we built for exactly that: twelve count tools for the device types, and for each of the eight systems a sequence tool, a custom note tag, and a PolyLength measurement in that system’s color, so every device number on the drawing told you which system it belonged to at a glance.
Look at the Tool Chest, and you’ll notice the tools themselves are deliberately plain: simple shapes, solid colors, generic tool names, nothing elaborate. That was their call, after we walked through the options together, and it was the right one for them. They wanted tools versatile enough to work on any project, with the custom columns carrying the weight of the metadata instead of the symbols. Keeping the tools simple also kept the Tool Chest small, so the team wasn’t digging through dozens of variations to find the right one. I’ve built far more detailed tools for companies whose drawings and deliverables called for it, and on a telecom job, with every cable type and combination broken out, a Tool Chest can get a lot more granular when the job needs it. The goal is never how elaborate the tools look. It’s building around how the team actually works.
The real work lived underneath the colors. We built custom columns for the data their team tracked on every device: unique device name, network router, COM port, MSTP bus, object ID, IP address, FTR and FTR number, power panel, power VA, control drawing, and more. The Markups List collected all of it, for every system, across the entire drawing set, while a custom Legend for each system color put that system’s devices front and center on the sheet. Change management is part of every implementation I do. Not everyone is ready for change, so we match the existing workflow as closely as possible and keep some of that muscle memory intact. Because this team already spoke the color language, a little training was all it took, and they moved into the digital workflow quickly.
Telecom fits the same pattern. Swap control systems for closets, device data for drop data, and the structure carries over almost one-for-one. It’s the same thinking behind the device count workflow I laid out for low-voltage contractors.
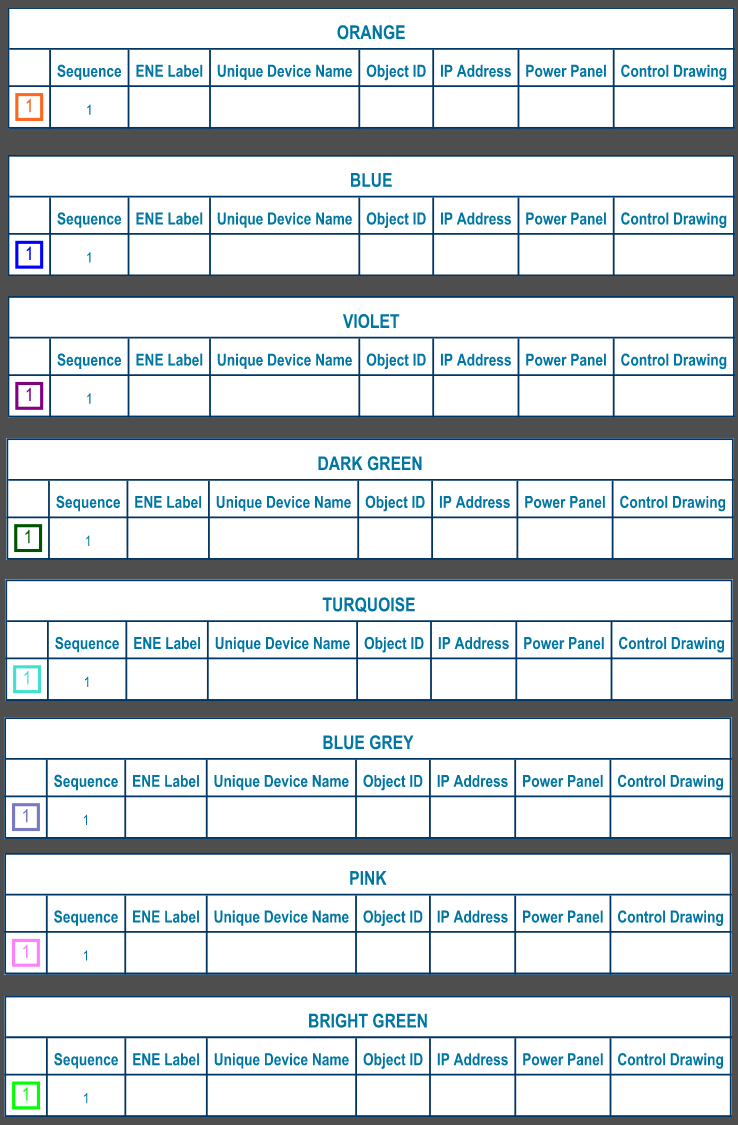
That’s also why I’d rather build this around your team than hand you something generic. Your closet naming, your labeling format, your slack allowances, and the way your senior estimator thinks about pathways all belong in the Tool Set from day one. The estimator who’s been doing this for fifteen years knows which assumptions hold up and which ones come back later as change orders, and a Tool Set built around that judgment keeps it working for the rest of the team. It also makes the summer intern as accurate as the rest of the team. Standard tools generate consistent results no matter who uses them.
If you’d rather not start from a blank Tool Chest, my partner SimpleTech makes solid pre-built tool sets for Bluebeam Revu. They don’t offer a telecom-specific set, but their electrical rough-in tools cover the backboxes behind every drop, their strut tools handle racks and supports, and their drawing templates give shop drawings a clean starting point. You can see their tools here. Use code 8ZPLQYCOTL for 10% off at checkout. Keep in mind they’re visual tools. To carry drop data through the workflow above, they need custom columns for closet, drop ID, cable type, or any other data. (Quick disclosure: that’s a referral link; I earn a small commission if you buy through it.)
If your takeoffs stop at the count and the footage still comes from a percentage, that’s worth a conversation. See how I approach custom workflows for trades like yours on the Services page, or set up an Intro Call and we’ll talk through what your bids actually need.
Frequently Asked Questions
What if a closet’s drops are spread across several sheets?
That’s no problem. The closet lives in the tool, not the sheet, so the Markups List collects every drop for that closet across the whole set. Leave per-page reset off on the sequence, and the numbering keeps counting from one sheet to the next.
Can one setup handle both copper and fiber?
Yes. Copper horizontal drops and fiber backbone become different tools in the same Tool Set, each with its own color or line style, measurements, and columns, so a mixed scope stays in one takeoff while the Markups List keeps them separated.
Does the drop numbering have to follow a specific labeling standard?
No. Sequences follow whatever format you set up, whether that’s the owner’s standard, the engineer’s spec, or your company’s own convention. Most telecom specs call out a labeling requirement, so matching it at bid time saves rework later. If you work to more than one standard, you can build a Tool Set for each. And once the system’s built, why not use it on every project? You get consistency across the whole team and the full project lifecycle.
Responses